In this section we will show you how to customize the way your information is display

Group Contracts Information
- It will group the information according the order of the headers located in the “Grouping Area”
- By default the information is grouped by:
- Crop Year
- Crop Type and Unit
- At this point you can either
Remove Grouping Information
There are two different ways to remove a group from this screen
- You can drag away the box from the “Grouping Area”
- You can use the header menu to ungroup
1) Drag away the box
- Click the box that you wish to remove the gouping
- Drag it outside the “Grouping Area”

- Once you have removed the box from the “Grouping Area”, the information will be display ungrouped
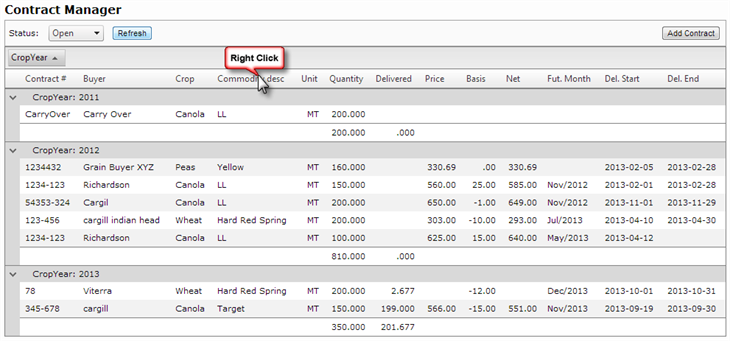
2) Using the header
The second option to remove the groups is to use the headers of the table.
- Locate the header that is grouped
- Right click on it

- It will display a menu
- Select the Ungroup option
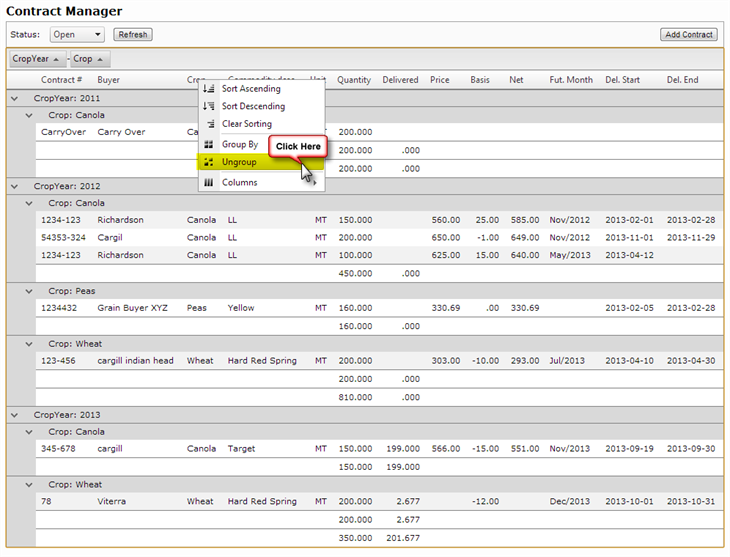
- And the box on the “Grouping Area” will disappear
Add a Group
- If you removed all the grouping boxes from the “Grouping Area”
- The “Grouping Area” will display basic instructions on how to group

- At this point: you can group the information by one of the headers of the table
There are two ways to group the information
- Dragging the header to the "Grouping Area"
- Using the header menu
1) Dragging the header to the Grouping Area
- As an example, let’s group the information by Crop
- Click on the word Crop and hold the click
- Now drag your cursor to the “Grouping Area” until you see a small set of arrows to the left of the “Grouping Area”
- Release the click

- After you release the click
- You will notice on the "Grouping Area" a box for Crop
- All the information will be grouped by Crop Type

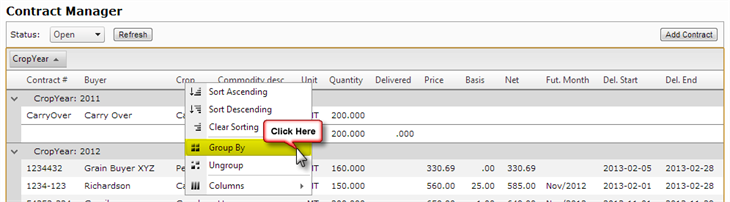
2) using the header menu
- As an example, let’s group the information by Crop
- Locate the Crop header on the table
- Right click on it
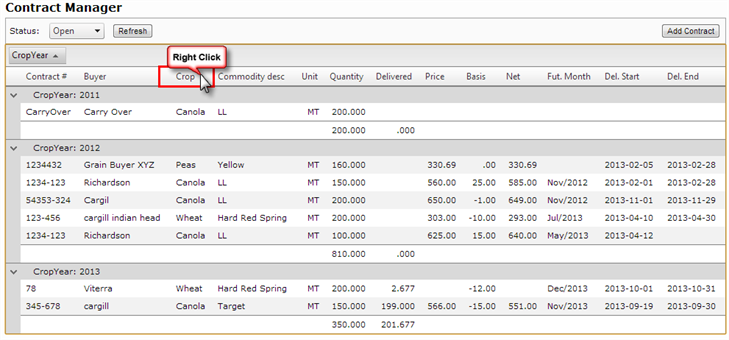
- A menu will be displayed
- Select the Group by option
- You will notice on the “Grouping Area” a box for Crop
- All the information will be grouped by Crop Type
Subgroup
- If you want to subgroup the information, you can add more headers to the "Grouping Area", by repeating the process of adding a group
- If you add more than one grouping header, it will group in the order they are arranged in the "Grouping Area"
- One example of this could be the picture below, first it is grouped by Crop Type, and then it is grouped by Commodity Description

Sort Contracts Information
You can sort by any of the columns headers
There are two ways to sort the information
- Clicking the header
- Displaying the header menu
1) Clicking the Header
To sort the Contracts information displayed, all you need to do is:
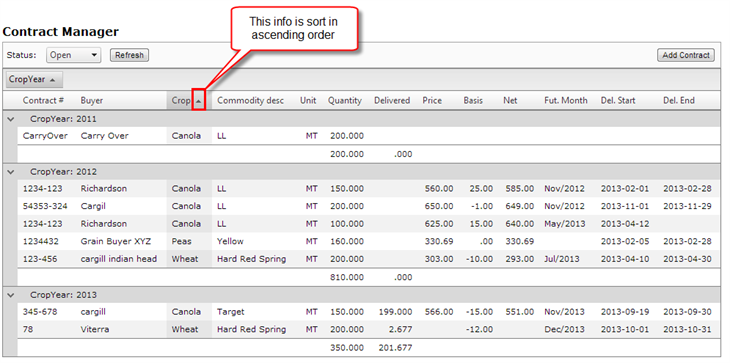
- Just click on the header you wish the information to be sort by:
- 1st click will sort on ascending order
- 2nd click will sort on descending order
- 3rd click will remove the sorting
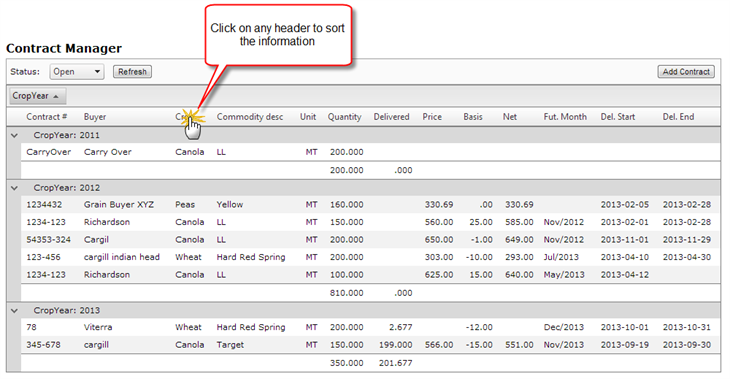
- After you have clicked the header you will notice the information will be sort
- Also on the header you clicked, a small arrow will appear.
- If arrow goes up the information is sort in ascending order
- If the arrow goes down the information is sort in descending order
2) Displaying the header menu
- Locate the header you wish to sort the information by
- Right click on that header
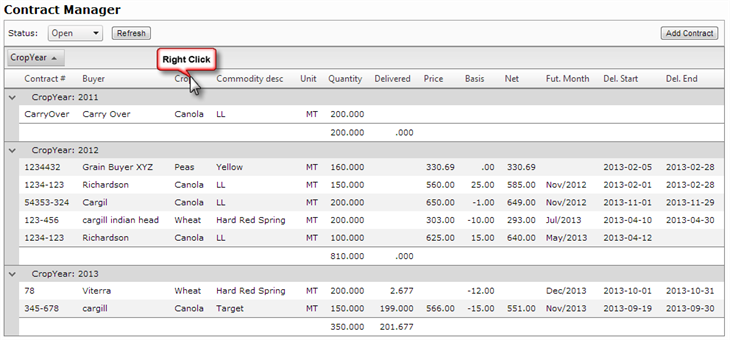
- A menu will be displayed with the options of:
- Sort Ascending
- Sort Descending
- Clear Sorting
- Select the type of sorting you wish to display
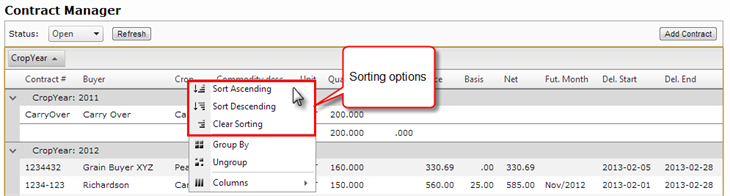
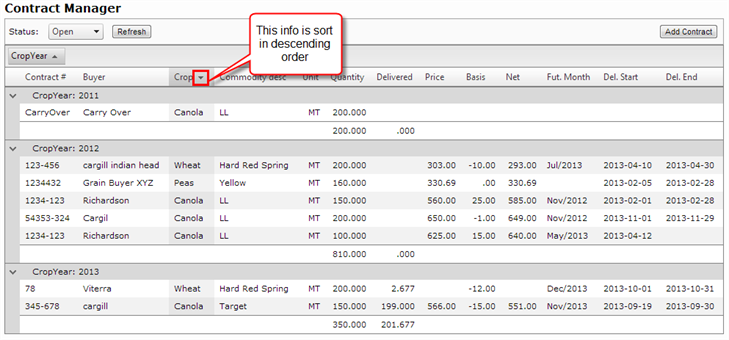
- After you have selected an option the information will appear according to the type of sort
- If you wish to remove the sort, just select the Clear Sorting option
- You will notice the same small arrow will show you what type of sorting was applied to the table
- Upward arrow = ascending order
- Downward arrow = descending order
Filter Contracts
You can filter the information available by the status of the contract on the top section of the page
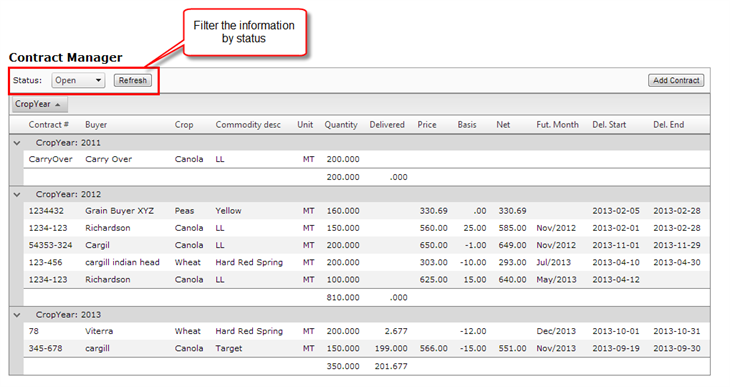
- Click the dropdown menu to select the status
- Select the status
- Click on the Refresh button

- After you have clicked the Refresh button
- The table will be updated with only the contracts that have the type of status selected

Customize Columns
- You can customize the columns you want to be displayed
- Just right click on any of the headers to display the menu
- A menu will be displayed
- Roll over the Columns option to display additional menu
- A list with all the columns available will be displayed
- You will notice that next to each of the columns there is a checkbox
- You can check or uncheck the columns you wish to add or remove
