If you don’t have this tab available, please contact our Support team by sending a support request to activate this page for you.
Here are the steps to upload your yield map in the system
Navigate to this screen:
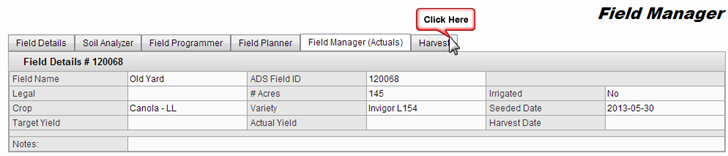
Prerequisites
- The field has a boundary.
- You have a point shape file ( *.shp) with your yield data.
Features
Functions that you can do:
Upload files
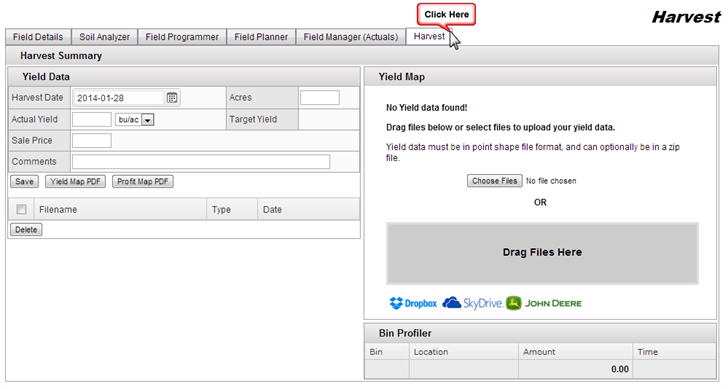
- There are two ways to upload your yield point shape file
- Dragging and dropping the files
- Using the choose files button
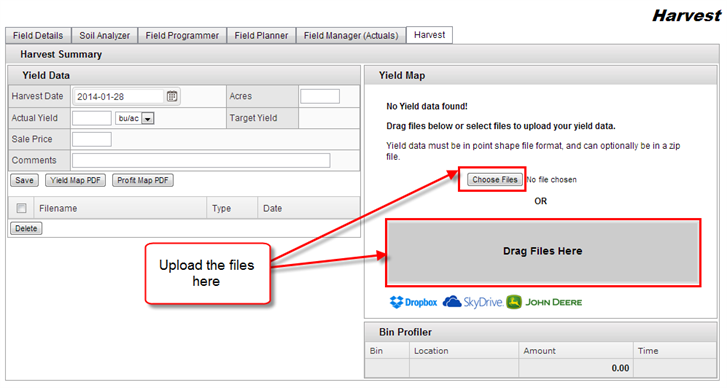
- Select or drag the files that you are going to upload
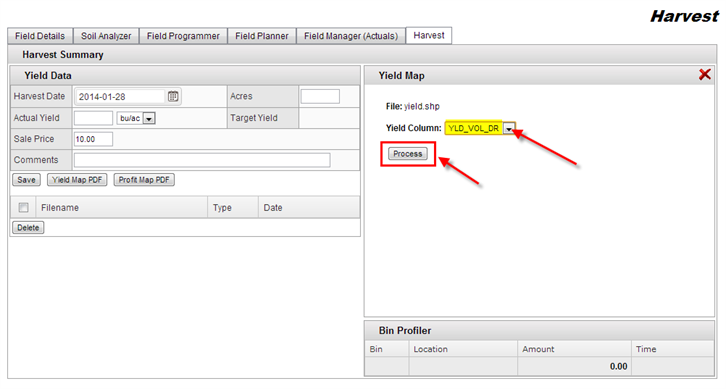
- You will notice a dropdown menu will be available
- From the dropdown list, select the yield column from the dbf file (eg, YLD_VOL_DR)
- Click Process button
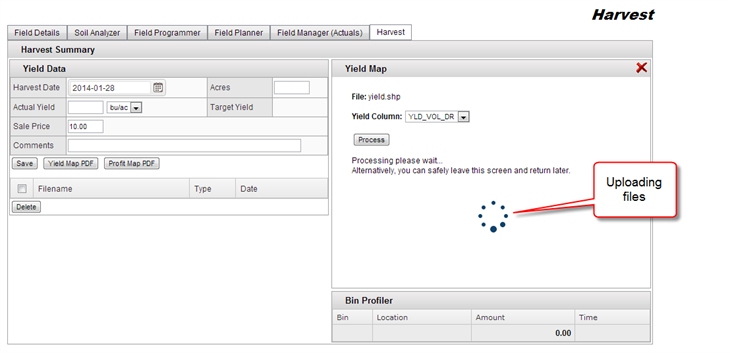
- After you have clicked the Process button
- The backend processing can take up to a minute to complete.
- At this point you can leave the screen or wait.
- Once the data has been processed, a map will be displayed with yield grid and raw yield overlays
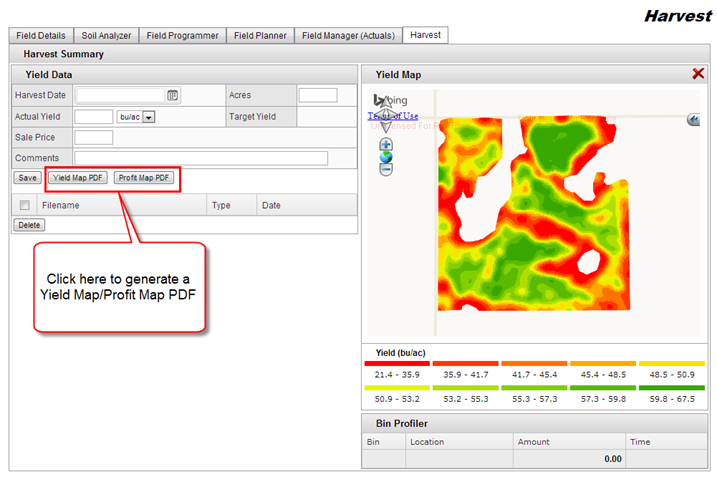
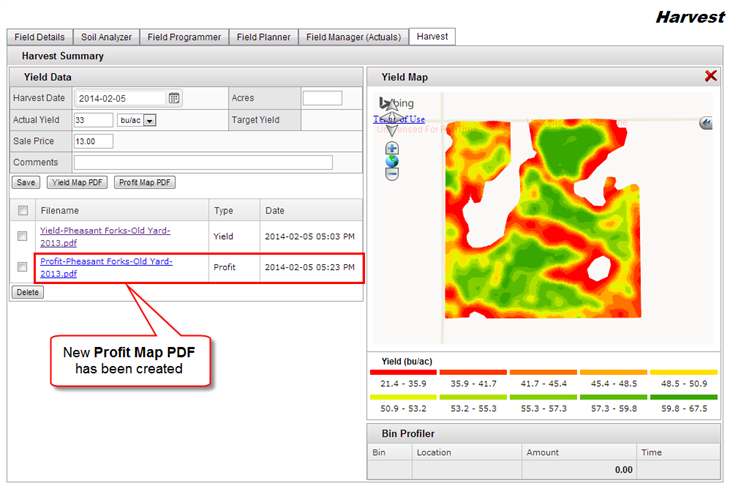
- Now you will be able to generate a Yield Map PDF and a Profit Map PDF
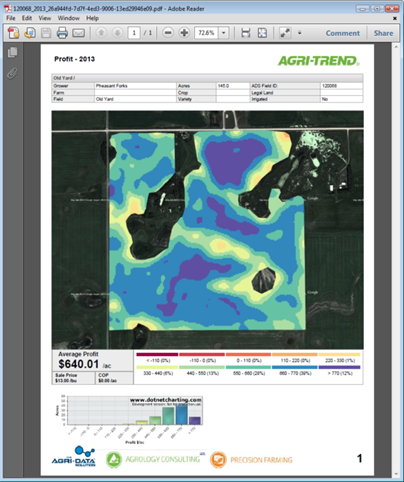
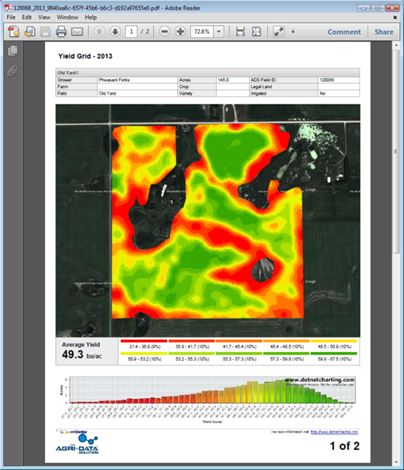
Yield Map PDF
- Click the Yield Map PDF button
- The table underneath the buttons will populate with a link
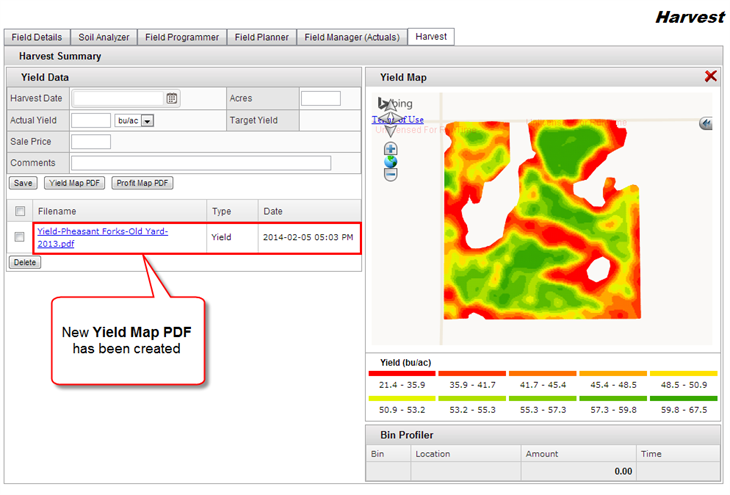
- You can open the PDF by clicking on the blue link
- A new window will be display with the two page report
- From here you can save the PDF
Profit Map PDF
- In order to generate a Profit PDF you need to enter the yield information on the left side of the screen
- You should also have your field expenses entered.
- Click the Save button.

- Click the Profit Map PDF button
- The table underneath the buttons will populate with a link
- You can open the PDF by clicking on the blue link
- A new window will be display with the two page report
- From here you can save the PDF