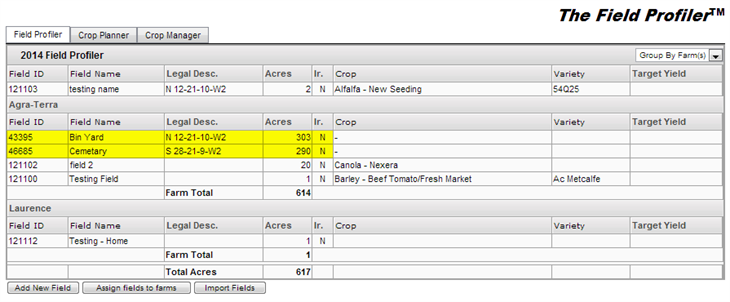
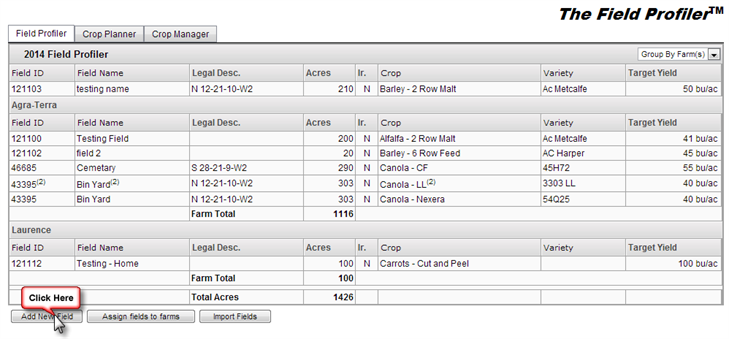
Field Profiler will display all the fields that are available for the crop year selected, along with some information regarding each of the fields, such as, name of the field, Legal Land Description, number of acres, the intended crop type, the variety, and the target yield.
You will be able to set sub farms, if you wish to manage their data separately, to learn more about it go to the Farm Information page
- The Field Profiler will list all of the fields added for the selected crop year.
Navigate to this screen:
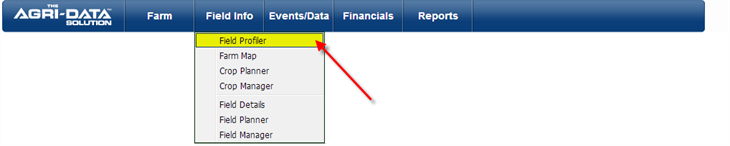
- From the top menu select Field Info
- From the drop down select Field Profiler
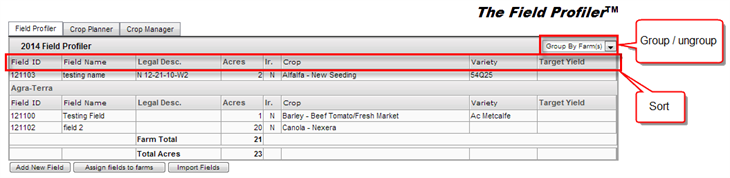
- A new screen will be displayed, where you can see all the fields available for the crop year selected. You can sort the list by clicking on the header of the table.
- You can group or ungroup the fields by farm, just by changing the option on the dropdown located on the top right corner of the table
- Also you can sort the fields by: Field ID, Field Name, Intended Crop, and Variety.
- To sort the list of fields just click on the header. You can sort by:
- Field ID
- Field Name
- Crop
- Variety
Features:
Access the Field
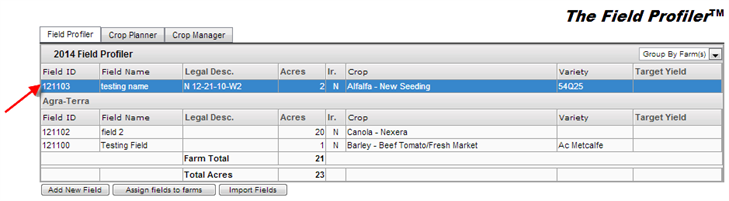
- To access the field details, just select the desired field from the list available
- After selecting a field, the Field Details screen will be displayed
To learn more about the Field Details screen please <Click here>
Create a Field
- Click on the Add New Field button
- On this screen with the help of the dropdown menus for each section you can enter all the information related to your field.
- The form will look something like this:
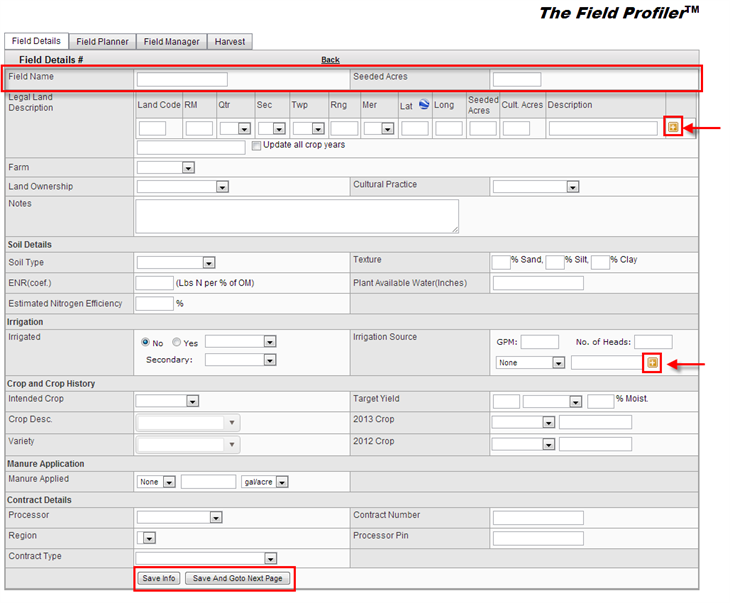
- After you have finish entering the information of the new field
- Click the Save Info button or Save And Goto Next Page button
Assign Fields to Farms
- To learn how to create a Farm <Click here>
- You can assign fields to different farms on your account, this way you can organize/manage the farms and its fields separately.
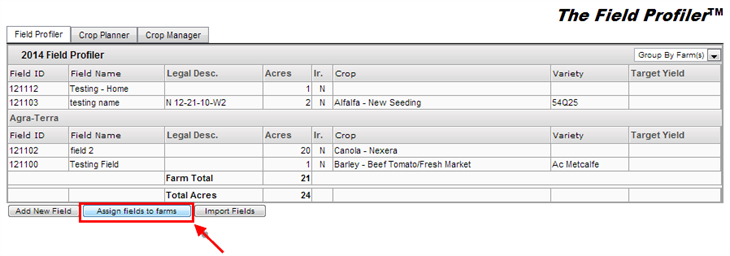
- Click on the Assign Fields to Farms button
- The table will slightly change, now you will be able to select fields and assign them to different farms
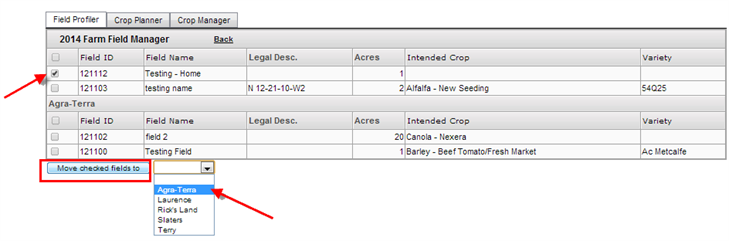
- Select the fields and farm you wish to move.
- Click on the Move Checked Fields to button on the bottom left
- You will notice that the selected fields have been moved to the selected farm
Import Fields
You can have your fields from one year, and pull them forward to another year.
This will carry over all the fields' information over the new Crop Year
- Click on the Import Fields button

- A new table will be displayed, where you can select fields from the previous year and import them to the next year. For example, in this image you can notice that there is an option to carry over all the fields or selected fields from 2013 to 2014 crop year.
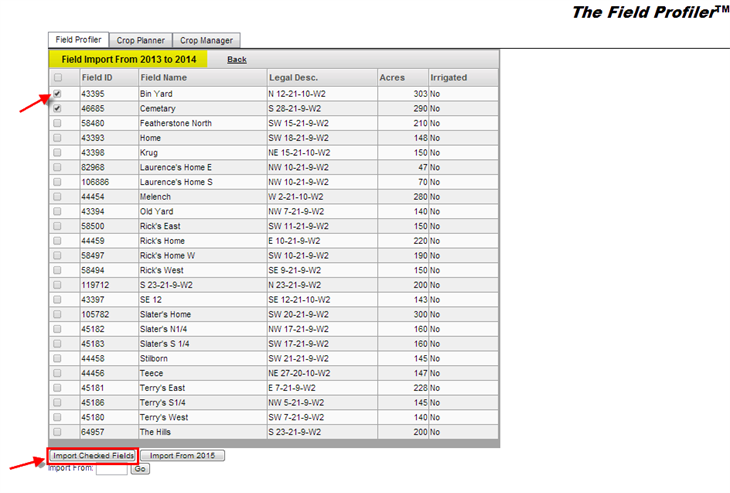
- Select the fields you wish to import, and click the Import Checked Fields button
- You will be taken to the field profiler table, and you will notice the fields you import now appear on the list