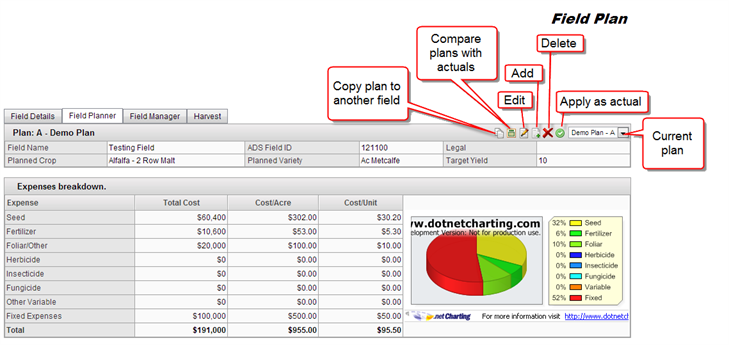
Field Planner it is a neat way to create a budget to a specific field. You can create different plans, compare them, and apply the one as actuals
Navigate to this screen
- From the top menu select Field Info
- From the dropdown menu select Field Planner

- This screen will be displayed
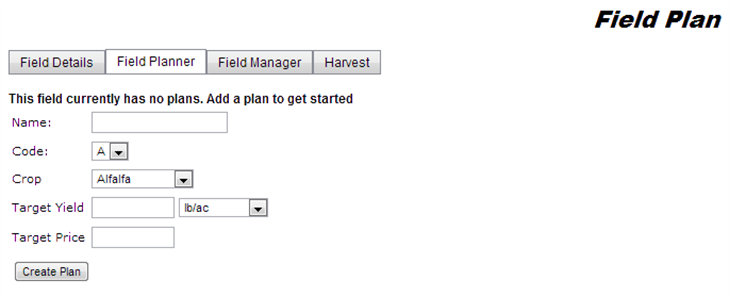
- Here you will be able to create a Plan for your field
Functions
Here are some functions that you can do:
Create a plan
- Enter the name of the plan
- Select the Code (A, B, C, D, E, and F) from the dropdown list
- Enter the Target Yield
- Select the units form the dropdown list
- Enter the Target Price
- Click the Create Plan button
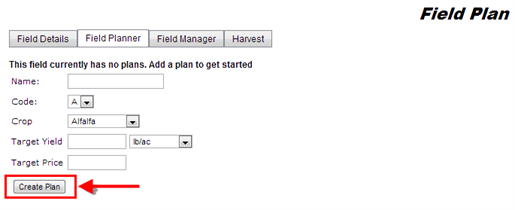
- After you clicked the Create Plan button, it will display a new screen that would look similar to the Field Manager application
- On this screen you will be able to plan a budget for the field selected
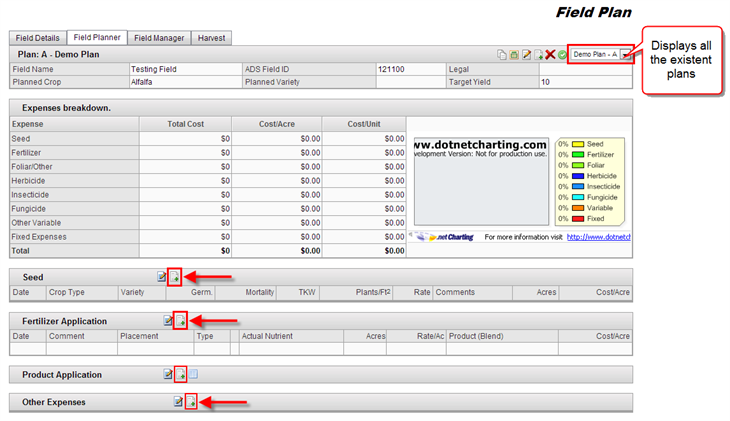
Add Application
- Locate the section you wish to add an application
- Click the Add icon
- A small window will be displayed where you can enter all the information to be added
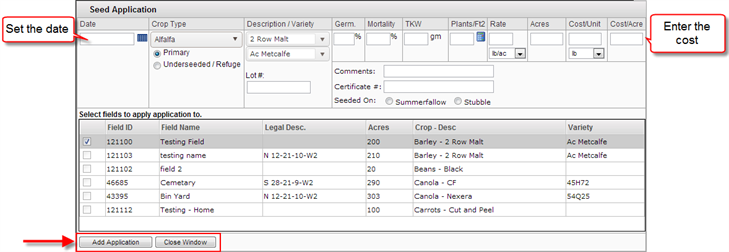
- Enter all the information required
- Click the Add Application button
Other Functions Available
Once you have finished setting up the plan, you have some additional options to do:
- Copy plan to another fields
- Compare plans with actuals
- Edit plan info
- Add another plan
- Delete selected plan
- Apply plan as actual
- Switch from plan to plan with dropdown list
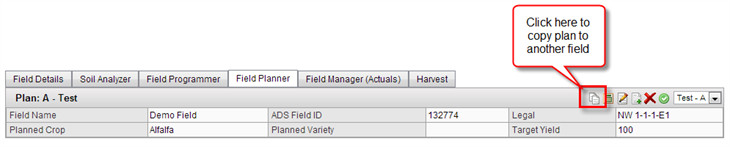
1. Copy Plan to another Field
- If you wish to copy the current plan to another field
- Click the “Copy” icon on the top of the page
- A small window will be displayed where you can select the Crop Year and field list
- Select the crop year
- Select the fields
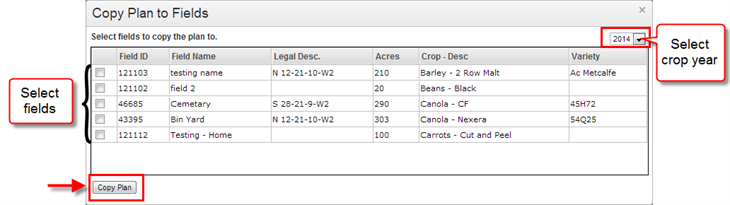
- Click the Crop Plan button
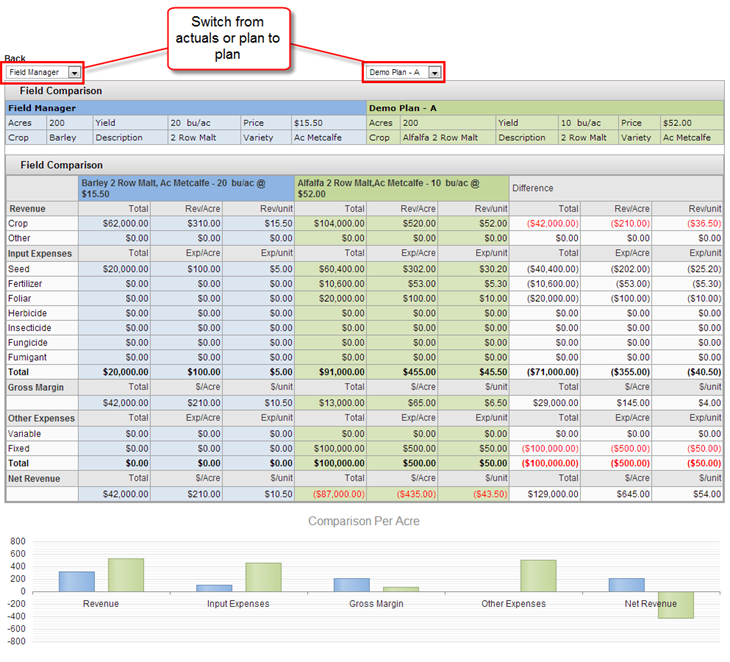
2. Compare Plans with Actuals
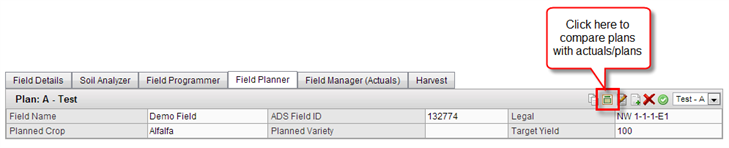
- A new screen will be displayed
- On the top there are some dropdowns options where you can select which plan or actual you want to compare with each other
- A new screen will appear where you will see a breakdown for the expenses and revenue
- A difference table from the compared values
- At the bottom it will graph both of the revenues, expenses, gross margin and net revenue.
3.-Edit plan info
- Click the Edit icon (with a pencil)

- A small window will appear where you can change the plan’s name, target yield, units, and target price
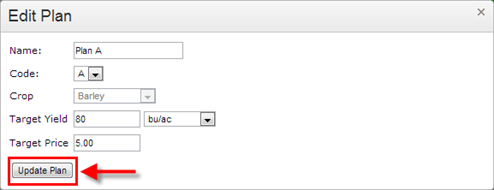
- Change the values you wish to edit
- Click the Update Plan button
4.-Add a New Plan

- A small window will appear where you can enter the information of the new plan
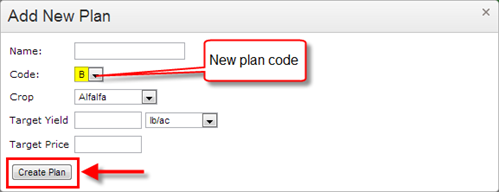
- Enter all the information from the new plan
- Click the Create Plan button
- Follow the same process of adding applications
5.-Delete Plan

- A warning window will pop up asking for confirmation in deletion
- Click the OK button
6.-Apply Plan as Actual
- Click on the green arrow icon

- A warning window will pop up asking if you wish to overwrite any data from the Field Manager with the new plan’s information
- Click OK button
- The Field Manager screen will be displayed with the new information of the Plan applied
7.- Switch from plan to plan with dropdown list
- Click the dropdown arrow to display the list of all the available plans
- Select the plan you wish to review
