Navigate to this screen
- From the top menu select Field Info
- From the dropdown menu select Field Manager

In this section you will review how to:
Add a Seed Application
- Locate the Seed section, and click on the "Add Icon"

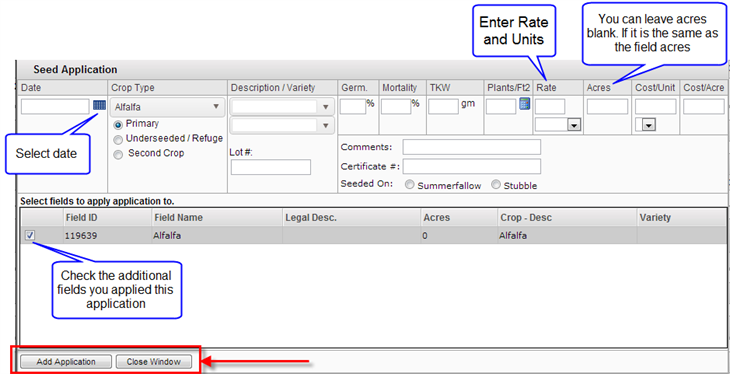
- You can click on the "Calendar Icon" to select the date the field was planted.
- Crop, Description and Variety should be pre populated, but if they are not or the values are wrong make sure to adjust to the correct variety.
- Enter the Rate you planted at along with the units from the dropdown menu.
- The Acres can be left blank if they are the same number of acres in the Field Details. It will automatically set the value to the total field acres. If the number of acres is different, just enter the number of acres that were applied.
- On the second section of the window, if you seeded more than one field on the same day with the same details, you can add the application to multiple fields by checking the check boxes for each additional field.
- To save all the information, click the Add Application button on the bottom.
- If you wish to cancel just click the Close Window, and the information will not be saved.
- Once you have saved your application the page will refresh with the details entered below.

Edit or Delete a Seed Application
- To Edit or Delete an entry, click on the "Edit Icon" that is next to the “Add Icon”.

- A small window will be displayed where you can make all the necessary changes
- Then click Update or Delete Selected if you want to remove an item.
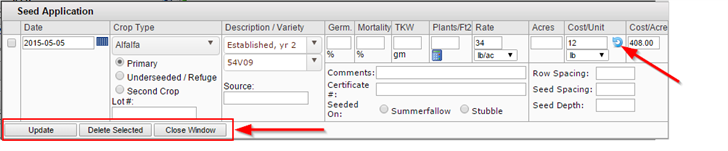
- if the price of your seed application has changed, you can just click the cyling arrow located in the Cost/Unit column. By clicking this icon it will pull the price from Crop Input Purchases