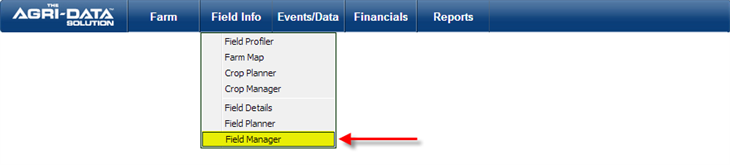
Navigate to this screen
- From the top menu select Field Info
- From the dropdown menu select Field Manager
In this section you will review how to:
Add Irrigation or Rain Application
- Locate the Weather and Irrigation Events section, and click on the "Add" icon

- A small window will be displayed where you can enter all the information
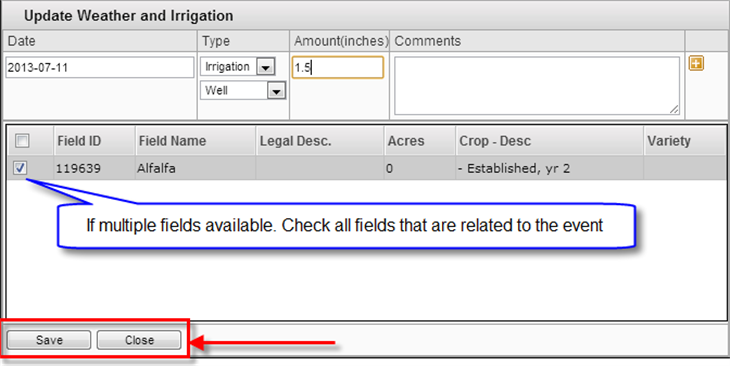
- Click the Date box to select a date from the calendar.
- Select the Type of irrigation (Irrigation, Rain, and Hail, Frost or other). If you enter Irrigation, select the water source (canal, well, pipeline, river, surface water and processed).
- in the Amount box enter the amount of water in inches
- if you wish to apply the same entry to multiple fields, just check the check boxes for all the additional fields
- To save the information, just click on the Save button on the bottom
- If you wish to cancel just click the Close, and the information will not be saved.
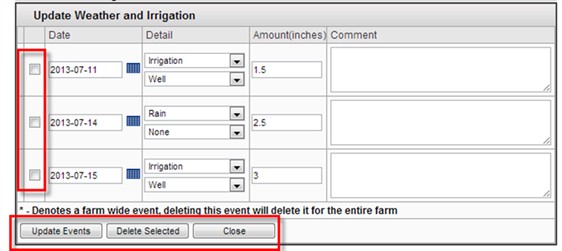
Edit or Delete Irrigation or Rain Application
- To edit or delete an entry, just click the "Edit" icon , a small window will appear with the available information

- Make all the changes necessary and then click the Update button
- Check the entries that you wish to remove and click the Delete Selected button
- If you do not desire to make any changes to the information just click the Close button.
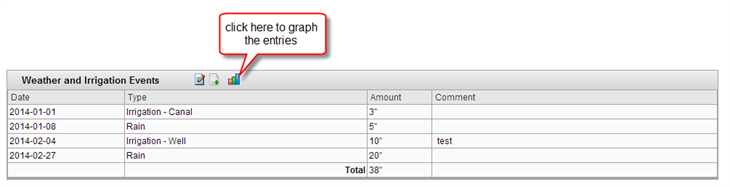
Graph Entries
- Once you have entered your irrigation it will appear a list of every entry you made.
- You can click the Graph icon
- Some graphs will be displayed where you will be able to see and compare the amount of irrigation you entered for your field

- You can filter the information displayed by applying a date range
- Enter the Start Date and the End Date
- Click the Apply button
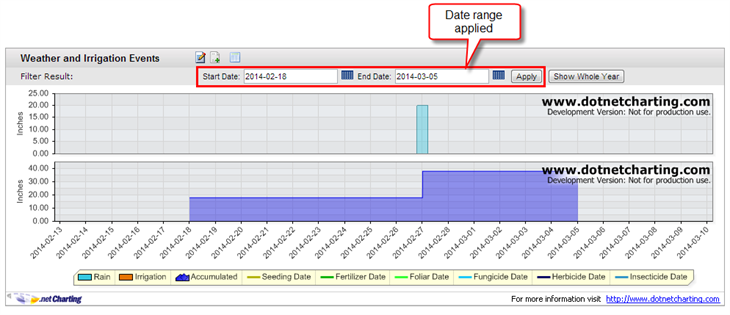
- You will notice that after filtering the information you will only see the entries that fall on that Date range
- To display all the entries of the year just click on the Show Whole Year