- The next step after setting up your fields will be setting up your boundaries. So we can generate a Farm Map
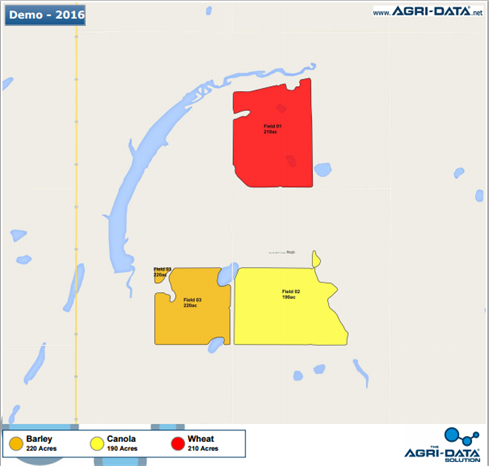
- The Farm Map is used to automatically color code the map based on your crop types.
Navigate to this screen
- From the top menu select Field Info
- From the dropdown menu select Farm Map.

- When you first set this up, you will not have any boundaries.
- A map will be displayed where all the fields that are set up in the system.
In this section we will show you how to:
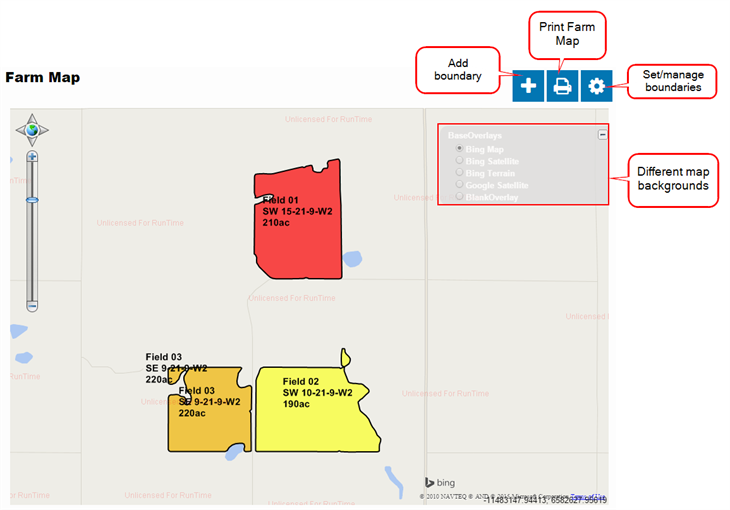
- You can change different backgrounds behind that map; we can go to a satellite background, terrain, or a basic road map.
- If you have some boundaries already it would look something like this.
Create a field by uploading a boundary / Upload a boundary to a existent field
- Click on the plus sign located in the Farm Map screen
- A new screen will be displayed where you can either drag your files or select your files
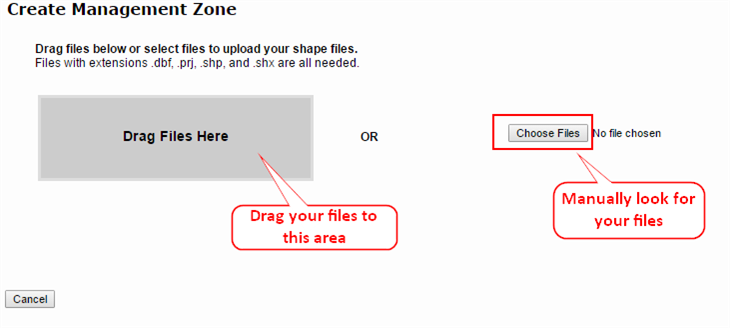
- Locate the file in your computer. They should have an extension .dbf, .shp, .shx , and .prj
- After you selected the files, the uploading process will begging
- After the uploading process is completed, it will display the information of the files uploaded
- Check the box of the files that you are uploading
- Click Preview Boundary Files to see the boundary in the map
- On the column name ‘Field’ select from the drop box “New Field” if you wish to create a new field or select your field from the list.
- From the Farm Column and Field Column you can select the farm or field name from your files OR you can type your own

- Click the Save Boundary Files
- A new screen will be displayed saying the number of Field Boundaries have been uploaded
- Click the Back to Farm Map link
- The new shape that you just uploaded will appear in the map
Manage your boundaries
- From the Farm Map screen click on the manage boundaries icon
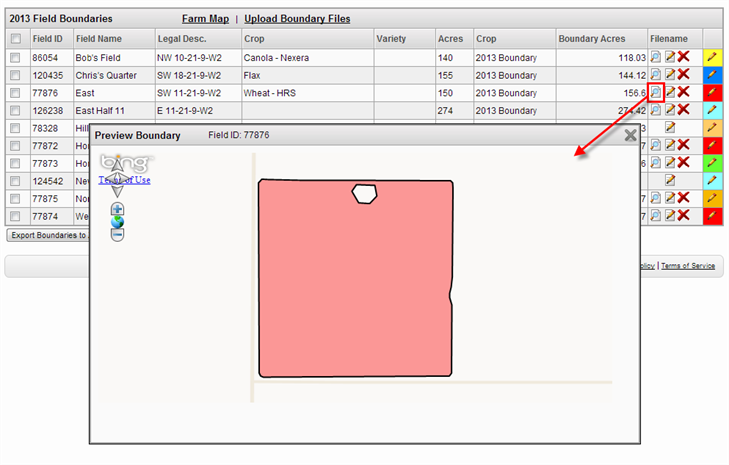
- A new screen will be displayed, where you can see all the boundaries that you have entered
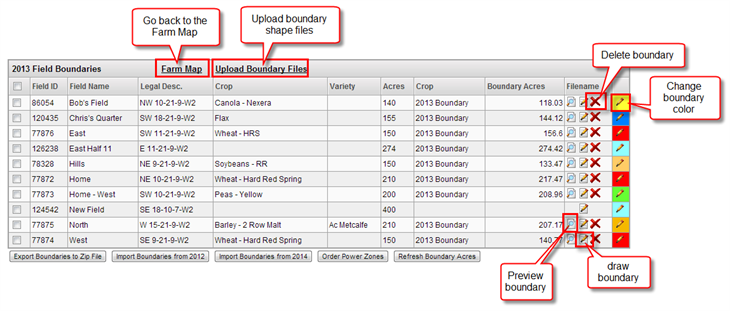
- If you wish to delete the boundary, just click the “X” icon
- You can preview the existing boundaries, by clicking on the “Preview” icon
Draw Boundaries
- You can add a new boundary, just click on the “edit” icon of the field you wish to draw the boundary

- A new tab will be open in your browser. And it will display a specific location based on the field Legal Land Location. (That is why it is important to get the right legal land location when you set up your fields.)
- On the right hand you can switch between Google and Bing imagery and some cases one might be better than the other depending on what area you are in.
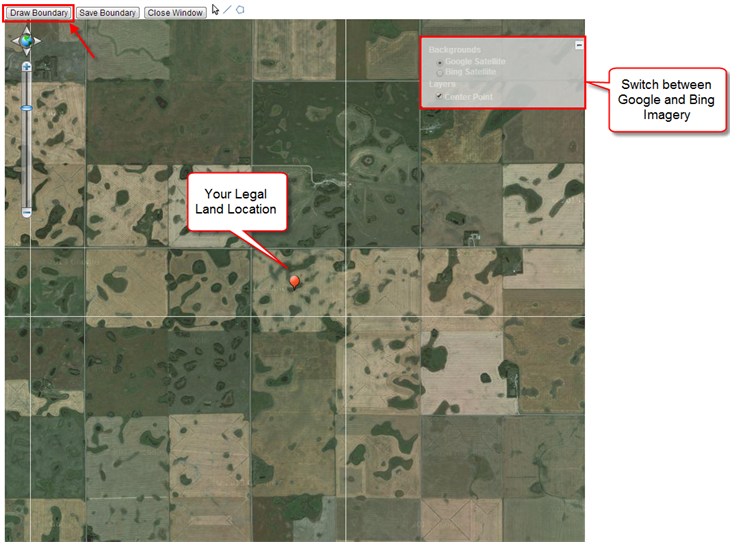
- You can zoom in, until you see your whole field
- To draw your boundary, click on the Draw Boundary button on the top left corner of the map
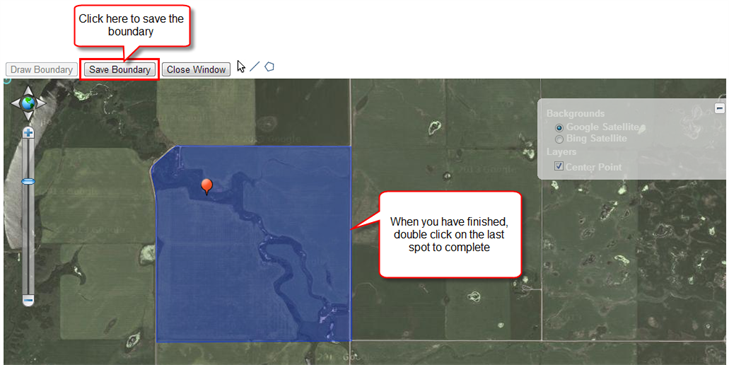
- With the help of your cursor click on the edges of your field. Trace the boundary around the satellite imagery of your field. When you have finished drawing your boundary, just double click on the last spot.
- The boundary should turn blue.
- If you have a separate piece of field that belongs to the same boundary, you can also trace that area, before you save the boundary.
- Once your boundary is blue, click on the Save Boundary button to save it.
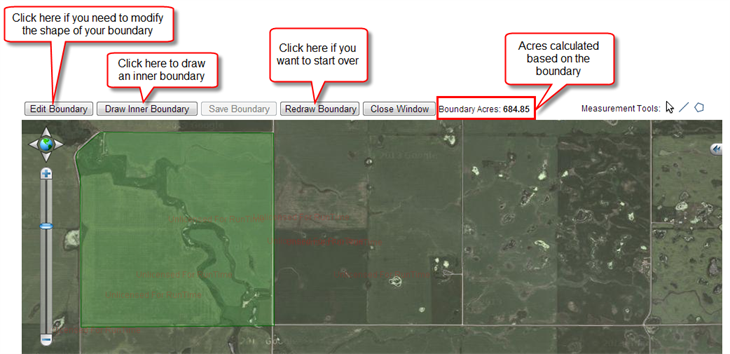
- After saving the boundary, the page will be reloaded and it will calculate the acres for that boundary.
Edit a boundary shape
- If you made a mistake while selecting the area, you can edit the boundary
- Click on the Edit Boundary button
- The field boundary will turn blue
- Select the boundary
- The boundary will turn orange, and you will notice some blue dots around the boundary
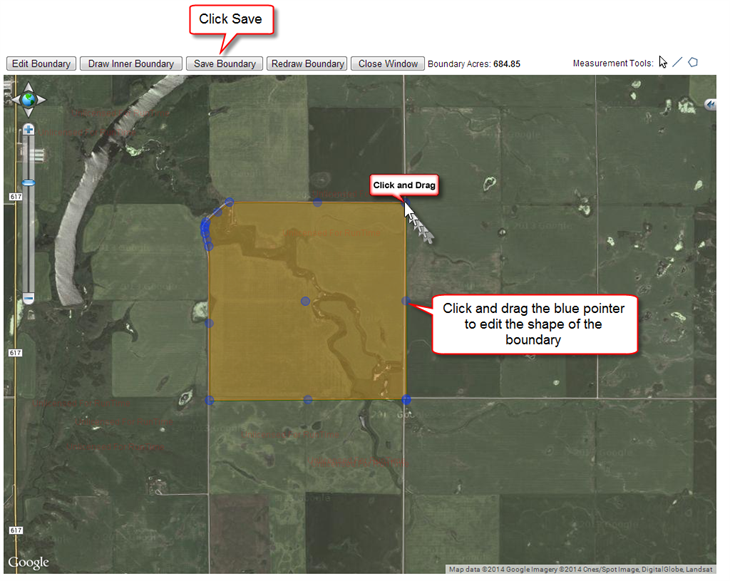
- You can move around this blue pointers, by clicking and dragging them around

- After you have modify the boundary shape, click the Save Boundary button
- The boundary will turn green again and the Boundary Acres will be recalculated
- Click the Close Window button
Draw an inner boundary
- If there is a section of the boundary that you want to exclude, you can draw an inner boundary, and trace the area that you wish to take out from the boundary
- Click the Draw Inner Boundary button on the top, trace the area you wish to exclude, and double click on the last spot. The area will turn blue
- Click the Save Boundary button again, you will notice the Boundary Acres will be recalculated
- After you trace the boundary you can click on the Close Window button
- Now you will notice that the boundary appear on your list of Manage Boundaries
Change color of the boundary
- To change the color of the field boundary displayed in the Farm Map
- Click the pencil icon

- A small table with colors will be displayed
- Select the color
- Click the Apply button
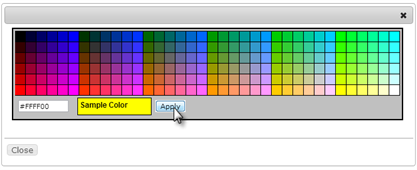
- The selected color will now be changed

Print Farm Map
You can also print your farm map from the reports screen, to learn how to do that <Click here>
To print your farm map through the Farm Map screen:
- Click on the printer icon located in the Farm Map screen
- A small window will display where you can customize your map, changing the font size, which fields you want to display, etc
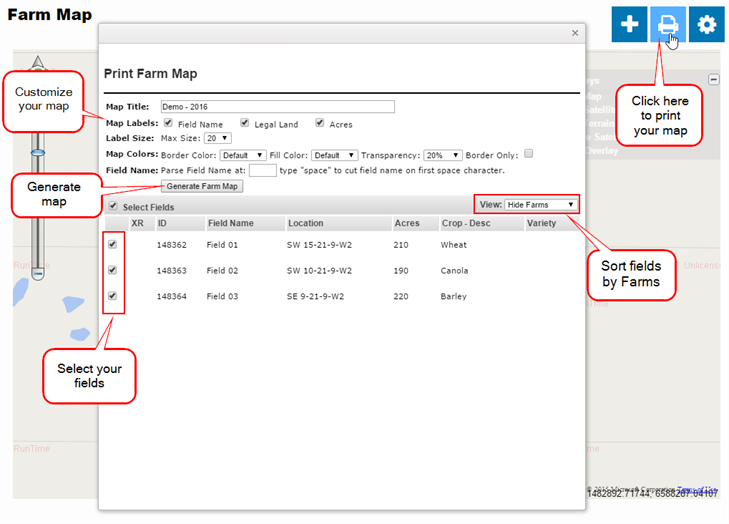
- After you have generated the Farm Map
- A new window will be open displaying the map of the field boundaries
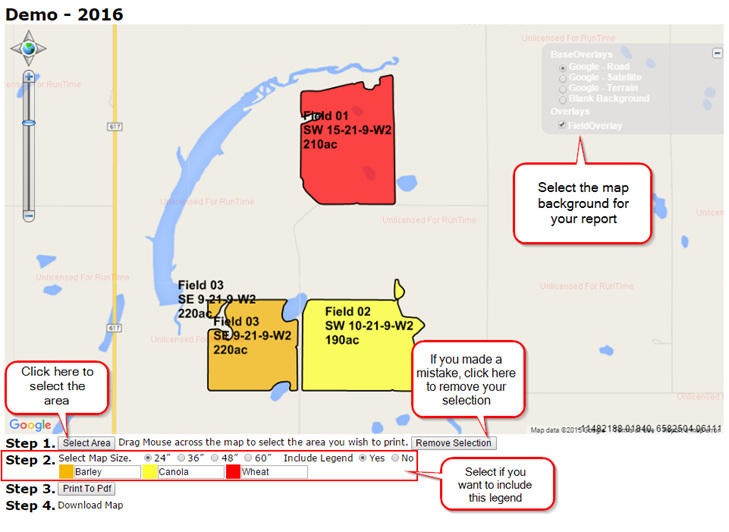
- You can change the map background
- Follow the steps provided on the bottom section
- Once you have selected the area
- Click the Print To PDF button to create report
- It will take a moment on the Step 4. To display a link to the PDF file
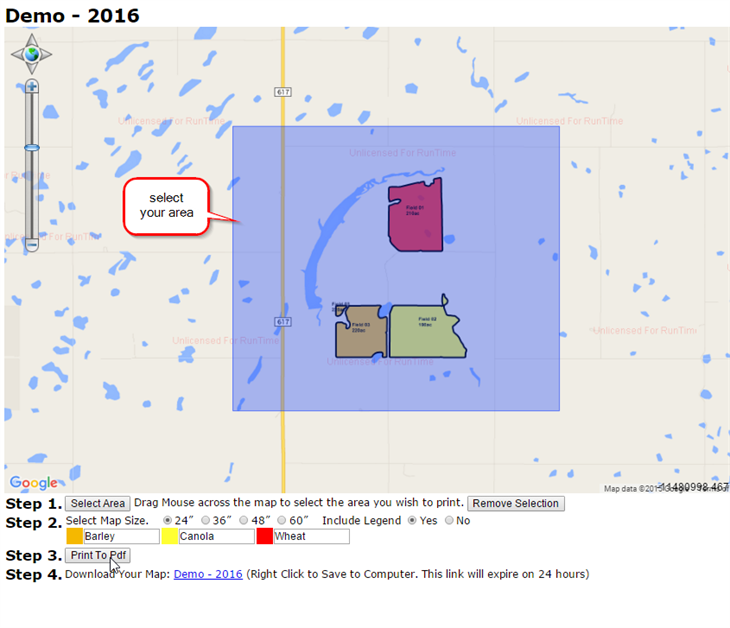
- Click the link
- The PDF file report will open in a new window
- You can right click to save the file to your computer
- A menu will be displayed
- Select the Save As… option to save to your computer