- To add any tests the process is basically the same as what it is going to be explained in this page. Let’s take the Soil Test as an example to show the process.
- To add any other test, please follow the same steps.
Table of Content
In this page you can add, edit, copy or delete a Soil Test
Add a Soil Test
- Manually enter data from each soil test report
- Import soil test reports using an Excel format.
- This method is very useful if there are multiple tests or fields. All data entered is attached to a specific Field.
Edit/Copy/Delete a Soil Test
Navigate to this screen
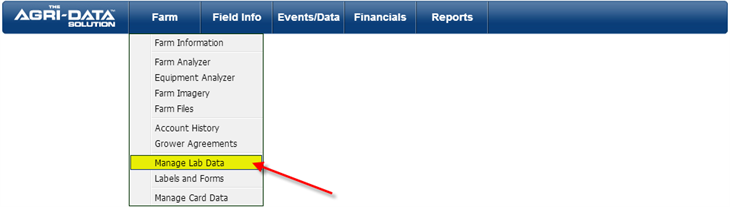
- From the top menu select Farm
- From the dropdown menu select Manage Lab Data
- A new screen will be displayed, if you have some test added before they will appear on a list format as appear on the next image:
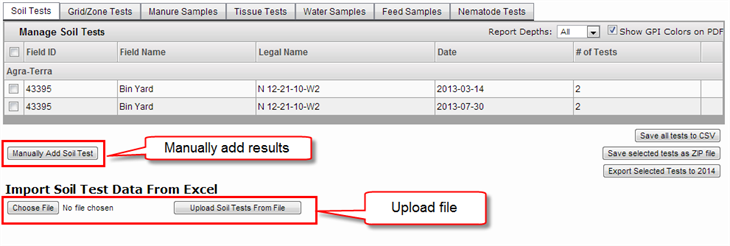
- There are two ways to store your Soil Tests, one from manually add the results of your soil test and two by importing a file with your results
Manually Add Soil Test
- Click on the Manually Add Soil Test button
- A new window will be displayed where you can enter the results for each individual nutrient
- Select the
Field ID,
Zone,
Depth,
Starting Depth, and
End Depth.
- Make sure to select a date when you are adding the soil test
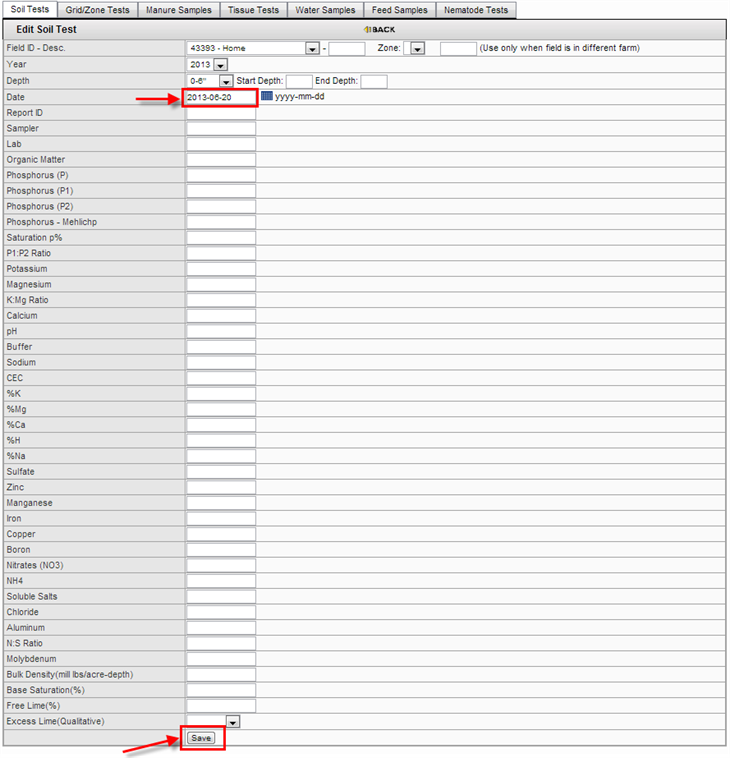
- After you finish entering all the values for each of the nutrients, click the Save button
Import Soil Test Data from Excel
** This feature only applies for the Soil and Tissue Tests **
It is very useful if you want to upload several test results from different fields at once.
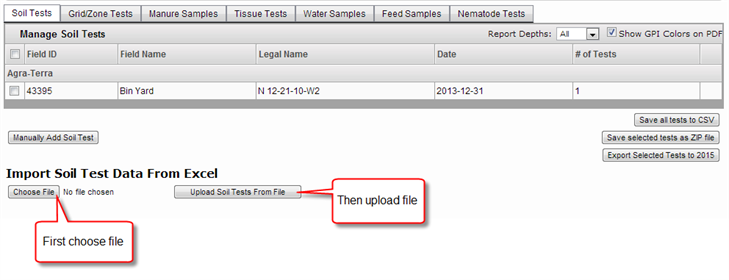
- Click on the Choose File button.
- A small window will appear
- Locate the file you are going to upload from your computer files
- Click the Open button
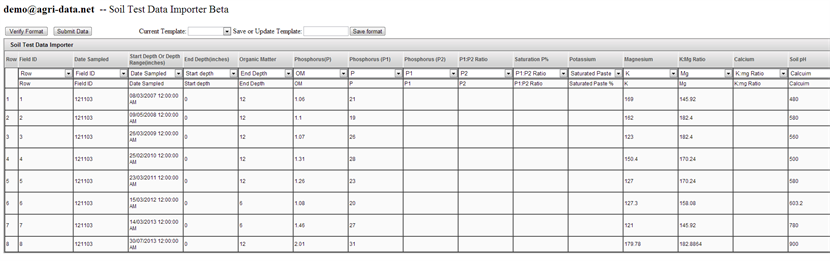
- Click the Upload Soil Tests From File button
- A new tab will be open with a preview of how your tests should look like.
- If the second header doesn’t match with the Top (silver) header, You will need to make some modification
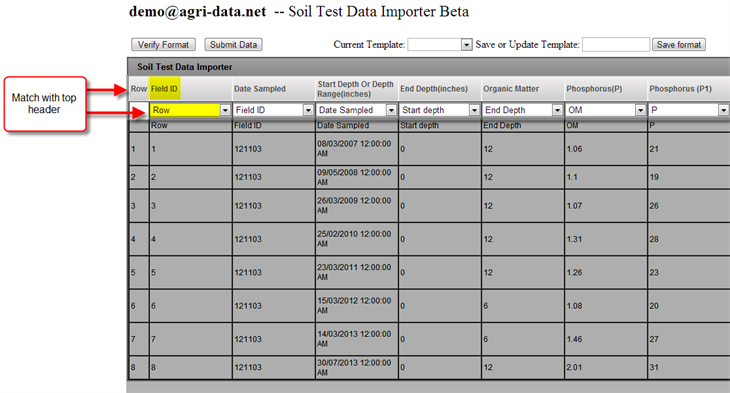
- Display the drop down list and select the option that matches the Top (silver) Header

- Make sure that the information is align and correct

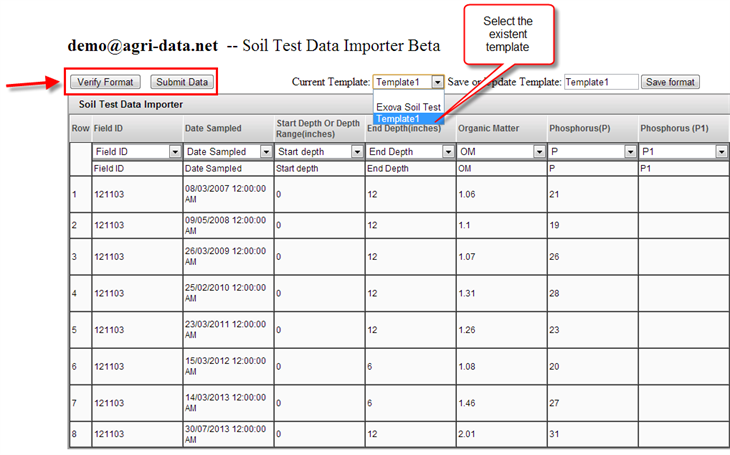
- Click the Verify Format button, to check that there are no errors
- You can save your format as a template,
- Just type the template name
- Click the Save Format button
- Click the Submit Data button
If you have already set up a template:
- If you do have a template, please select the template from the dropdown menu where it saysCurrent Template.
- Select the existent template
- You will notice that the format of the displayed information will be assorted automatically
- Click the Verify Format button, to check that there are no errors
- Click the Submit Data button
Edit/Copy/Delete Soil Test
- If you wish to edit or delete some information of the soil test submitted
- Select the field you wish to edit from the list
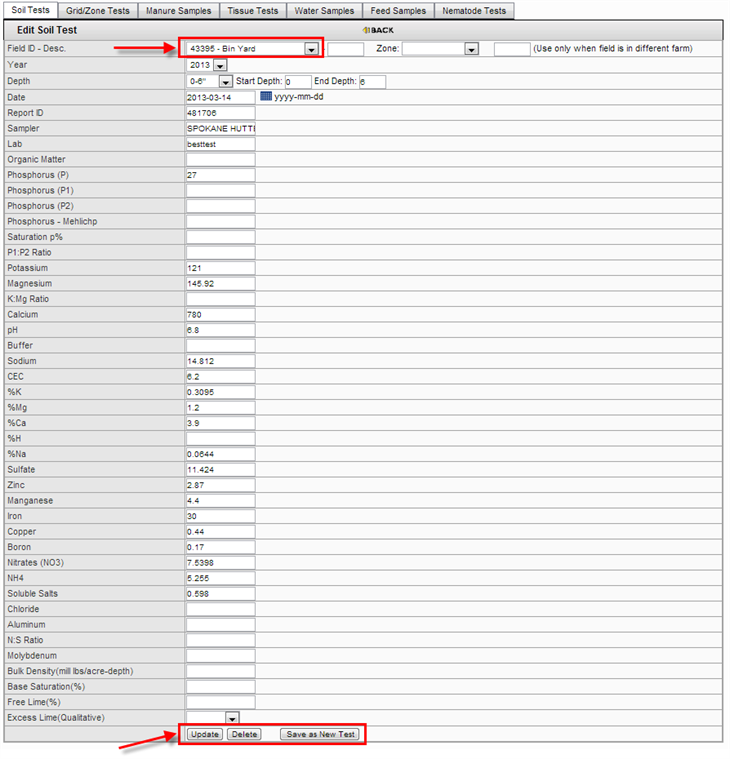
- Make the desired changes, and click the Update button
- If you wish to apply the same soli test’s result to a different field, just select the Field ID from the dropdown list on the top, and click the Save as New Test button.
- This will create a copy of the same soil test for the new field that you entered
- If you wish to delete the test, just click the Delete button