On this screen you will be able to import your transactions using your Agrimatics Libra files, and review every single transaction in detailed for all your bins
- From the top menu select Events/Data
- From the dropdown menu select Bin Transactions

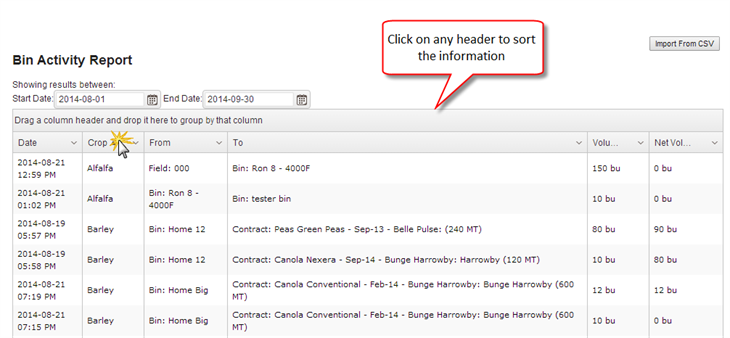
- This report will show you all the history transactions done in all your bins.
- The report automatically will display the all the transactions made in the past 60 days by default.
You can customize the way your information is displayed by:
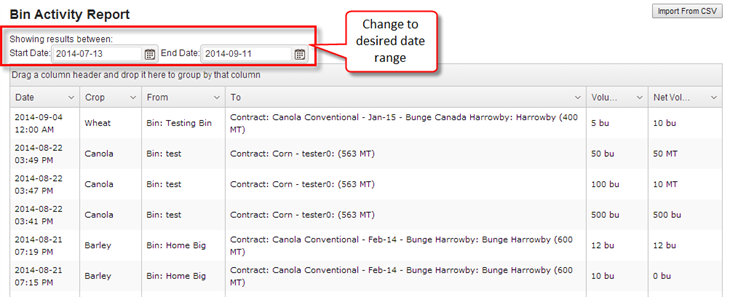
Changing the Date Range
- You can change the Date Range at any moment
- Just enter the desired Start Date and End Date on the top of the report
Group the Information
- You will notice on the top row of the table it will appear an empty row where you can drop any header to group the information
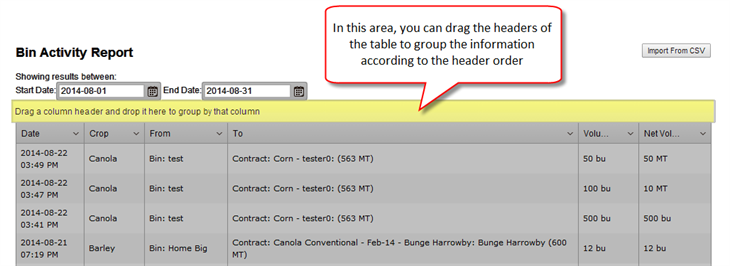
- you can group the information by one of the headers of the table.
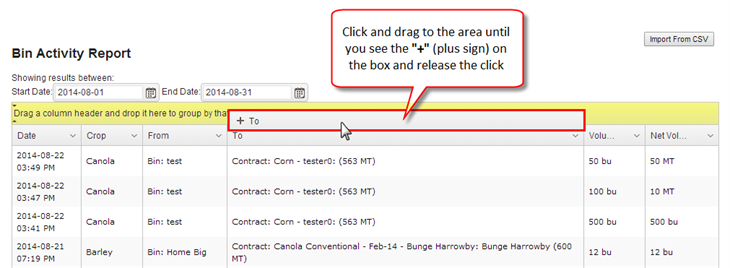
- Just click and drag the column header to the “Grouping Area” until you see a “+” sign on the box
- Release the click
- After you release the click
- You will notice a box on the top row, and the information is now grouped by that header
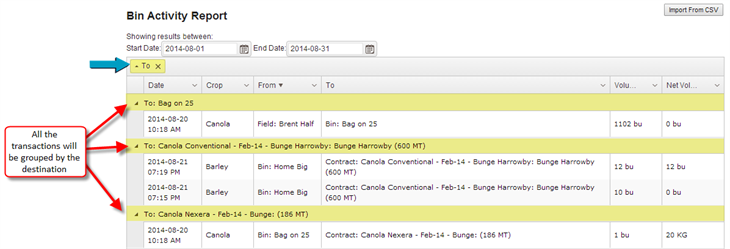
- If you want to subgroup the information, you can add more headers to the "Grouping Area"
- If you add more than one grouping header, it will group in the order they are arranged in the "Grouping Area"
- To remove any grouping, just click on the “X” of that box
Sort Bins Information
There are two ways to sort the information
- Click on the header
- Dropdown menu
1.- Click on the header
- This is the easiest way to sort the information either ascending or descending order
- You can sort by any of the columns headers
- Just click on the header you wish the information to be sort by
- 1st click will sort on ascending order
- 2nd click will sort on descending order
- 3rd click will remove the sorting
- After you have clicked the header you will notice the information will be sort
- Also on the header you clicked, a small arrow will appear.
- If arrow goes up the information is sort in ascending order
- If the arrow goes down the information is sort in descending order
2.- Sort using the dropdown menu
- You will notice on each of the headers there is a dropdown arrow
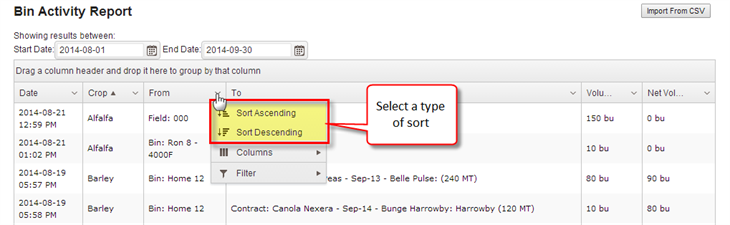
- Select the type of sort you wish your information to appear
- The information will be sort according your selection
- You will notice a small arrow will appear on the header that you sort it
- If arrow goes up the information is sort in ascending order
- If the arrow goes down the information is sort in descending order
Filter Information
- You will notice on each of the headers there is a dropdown arrow
- Click on that arrow to display the menu
- Roll over to the Filter option to display the options
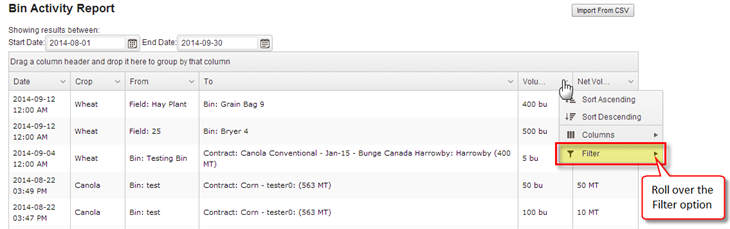
- A new menu will be displayed
- Select your parameters
- And enter the values
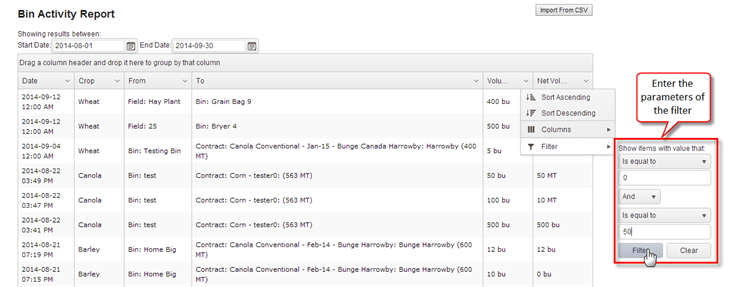
- Click the Filter button to apply filter
- Now your filter should be applied an displaying only the info filter
Customize Columns
- You will notice on each of the headers there is a dropdown arrow
- Click on the arrow to display the dropdown list
- Roll over Columns to display additional option
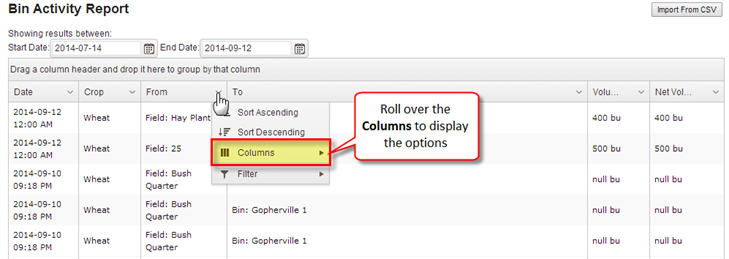
- A small list with all the columns will be displayed
- You will notice that next to each of the columns there is a checkbox
- Uncheck the columns you wish to remove from the table
