Bin Profiler helps you to make and keep track of any inventory transactions from all your bins.
Navigation
- From the top menu select Events/Data
- From the dropdown menu select Bin Profiler

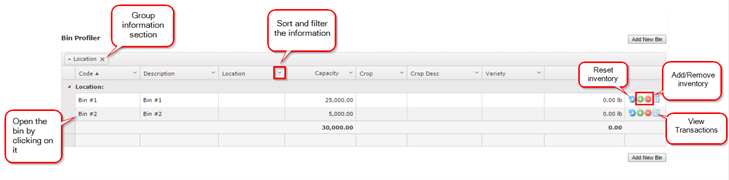
- The first thing you will see a list of all of the bins you set up on your farm.
Features
Add a Bin
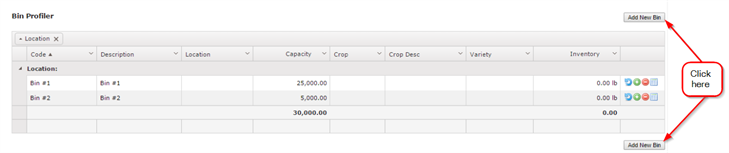
- To add a new bin, click on the Add New Bin button on the right (top or bottom right corner)
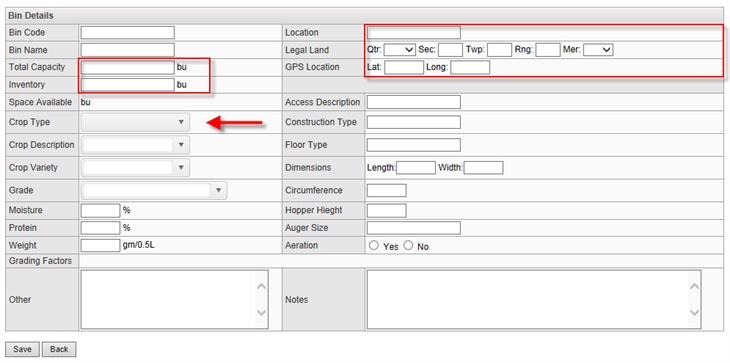
- A new screen will appear, where you can enter the bin information
- Enter the name and the code to help differentiate between bins.
- Specify the Crop Type that will be stored in the bin.
- Enter the Legal Land description of where the bin is located.
- Enter the Total Capacity and Current Inventory and many other useful pieces of information about the bin.
- Click the Save button.
- To exit without saving, click the Back button.
Edit/Delete an Existing Bin
When modifying a bin you can edit any information that was entered when the bin was created.
- To open the bin, just click on the row for the bin that you wish to modify.
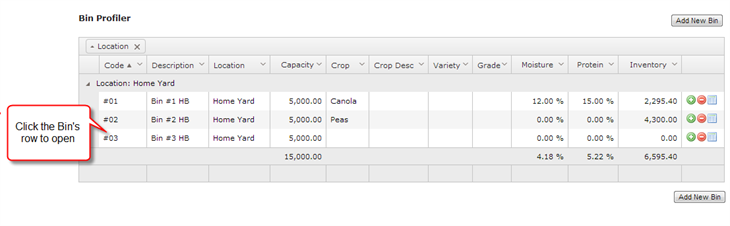
- A form will be displayed with the Bin’s information filled up
- Modify or enter the information you wish to edit
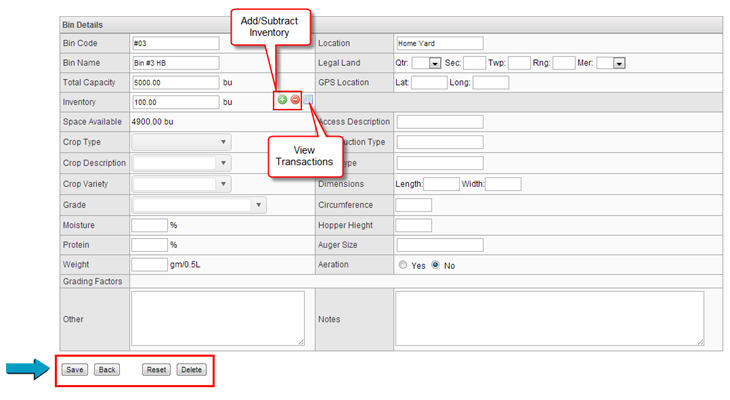
- Modify the inventory:
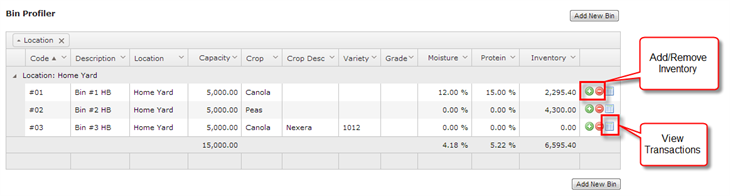
- Add or remove inventory using the "+" and "-" icons
- View the transactions made on the bin (for more detail on this <Click here> )
- To save any modifications, click on the Save button.
- To exit without saving changes, click the Back button.
- To delete a bin, click the Delete button located at the bottom of the window.
Manage Inventory
- Learn about the different ways to manage your inventory
Reset Inventory
- Clicking the cycling icon will reset the inventory in that bin
- it will create an entry in the Transaction Manager
- if you wish to undo the reset:
- Just open the Transaction Manager
- Edit the transaction by clicking on the pencil icon and delete
Add inventory
- Click on the “+” icon to add inventory to the bin
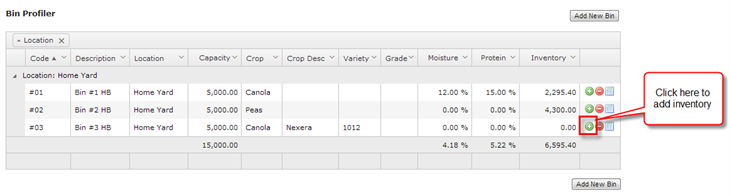
- After you have click the “+” icon, a small window will be displayed
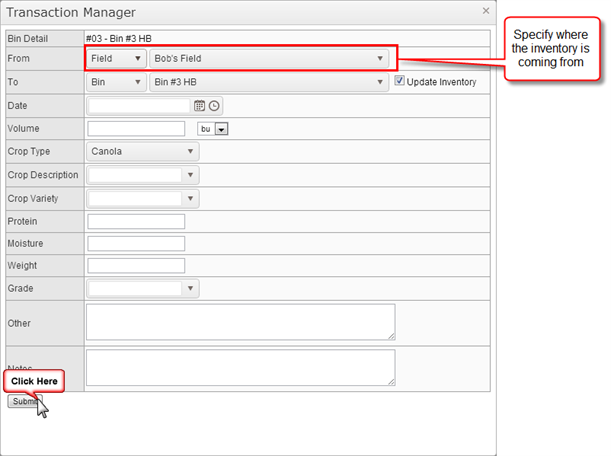
- You will need to specify from where the inventory is coming from:
- Field.
- Another Bin. You can transfer inventory from one bin to another
- Other
- And where is going to. Make sure is going to the intended bin
- There is a check box on the window "Update Inventory" that allows you to create transactions without affecting the current bin inventory.
- Check this box if you want to update the bin inventory or uncheck it to leave the inventory as is.
- Make sure to enter the date and the volume that you are transferring to the bin
- Select the Crop Type, Crop Description of the product and the rest of the information
- Click the Submit button
Remove inventory
- Click on the “-” icon to deduct inventory to the bin
- After you have click the “-” icon, a small window will be displayed
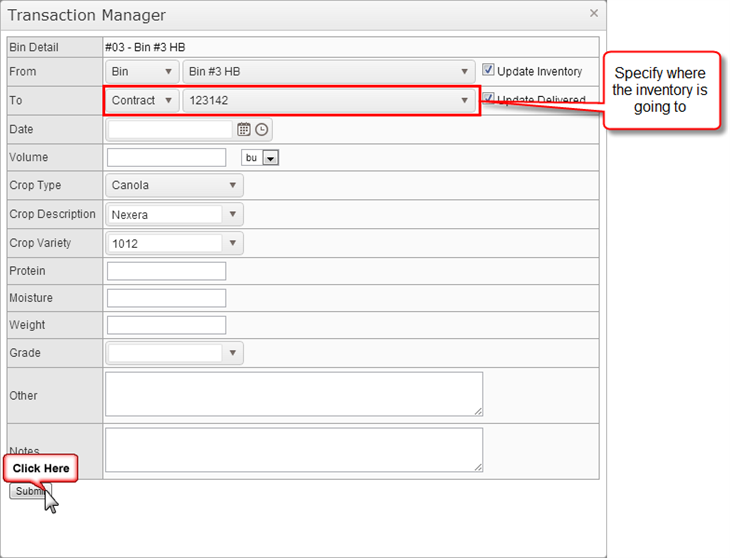
- Make sure it will be removed from the intended bin
- You will need to specify where the inventory is going to:
- Contract. This will be reflected on the Contract Manager page
- Bin
- Other
- There is a check box on the window "Update Inventory" that allows you to create transactions without affecting the current bin inventory
- Check this box if you want to update the bin inventory or uncheck it to leave the inventory as is.
- Make sure to enter the date and the volume that you are transferring to the bin
- When you do a transaction to a Contract the drop down will display on this order:
Contract # + crop + commodity – delivery date-year – buyer : location (volume)
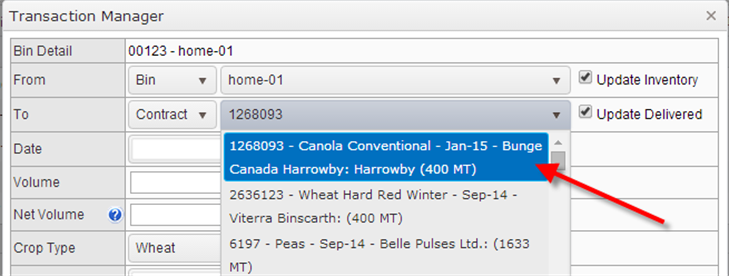
- Once you select a Contract, you will notice that a new field called Net Volume is added to the form. The difference between the Volume and Net Volume is that the Net Volume will only affect the contract’s quantity Delivered.
- If the Net Volume is left blank, the quantity entered on Volume will be used as normal.
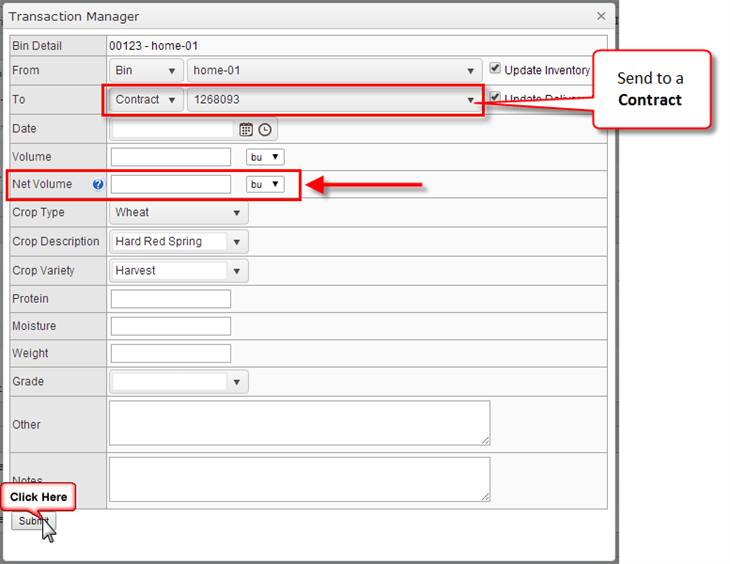
- Select the Crop Type, Crop Description of the product and the rest of the information
- Click the Submit button
View Inventory Transactions
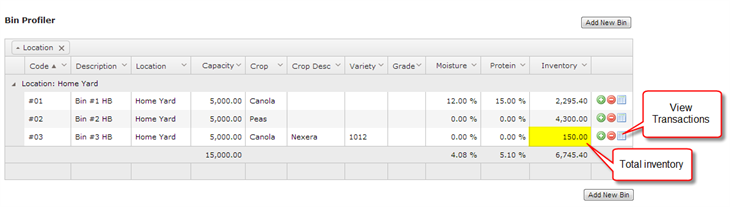
- The table will reflect the total inventory the bin stores
- Click on the “View Transactions” icon
- A small window will appear with a detailed list of entries made to that specific bin
- All the ins and outs should total the display total on the table (I.e. 200 – 50 = 150 )
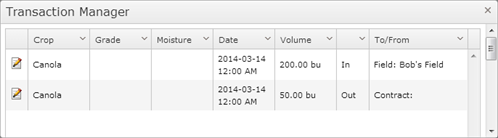
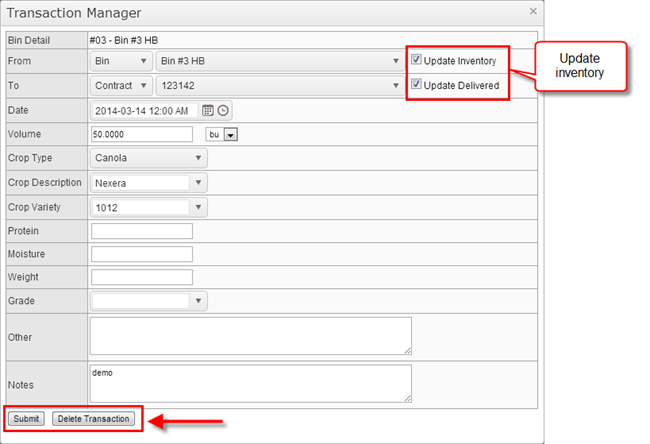
- This window is called the Transaction Manager and itshows all transactions that have occurred for the selected Bin.
- You can see the transaction type as well as where the crop came from or went to.
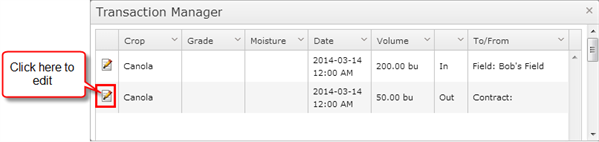
- Also you can modify/delete any transaction by clicking on the “Edit” icon located to the left of the transaction that you wish to modify.
Edit/Delete transaction
- Click the “Edit” icon
- A small window will be displayed with the information of the transaction
- There is a check box on the window "Update Inventory" that allows you to create transactions without affecting the current bin inventory.
- Check this box if you want to update the bin inventory or uncheck it to leave the inventory as is.
- Click on the Submit button to save changes to the transaction record.
- Or click the Delete Transaction button if you wish to delete the transaction.